
Mac storage guide
How to find large files on a Mac
Start with the tools already on your Mac. Use a visual disk map when you need to understand which folders are taking up space.
One large video, an old installer, or a folder full of smaller files can all explain a storage problem. Start by finding the items and checking what they are. A large size alone does not mean a file is safe to delete.
1. Check the overview in Storage settings
Open the Apple menu → System Settings → General → Storage. Give the categories time to update. If a category has an information button, open it to review its contents and available management options.
This is a useful starting point when you want to see whether documents, applications, or media deserve attention first. The categories are an overview; they do not tell you whether a particular file is still needed. See Apple’s storage guidance for the built-in options.
2. Find individual large files in Finder
If you have a specific folder in mind, such as Downloads, open it first. Otherwise, search across your Mac:
- Open Finder and press ⌘ + F.
- Choose This Mac to broaden the search, or the current folder to keep it focused.
- In the search criteria row, open the first menu (often Kind). Choose Other…, find File Size, and select it. Use the + button if you need to add a criteria row.
- Set File Size → is greater than → 1 → GB. Try 500 MB if that returns too few results.
Remove any unrelated name or type criteria that could hide results. Finder combines search criteria, so an extra condition narrows the list. You can save a useful search as a Smart Folder. Apple explains Finder’s search criteria.
Switch to List view and click the Size column to sort; click again if the largest files are at the bottom. If Size is missing, Control-click a column heading and enable it. See Apple’s sorting instructions.
A size filter finds individual files. It will not explain a large folder made up of many files below your threshold. Results also depend on what Spotlight can search, so an empty list is not proof that your disk contains no large files.
3. Follow large folders in a visual disk map
When a list of files does not explain the total, a disk map can show how space is distributed through folders. Tanuki Cleaner is our free Mac app for this: it scans locally and displays accessible files and folders in a sunburst map and a size-ranked list.
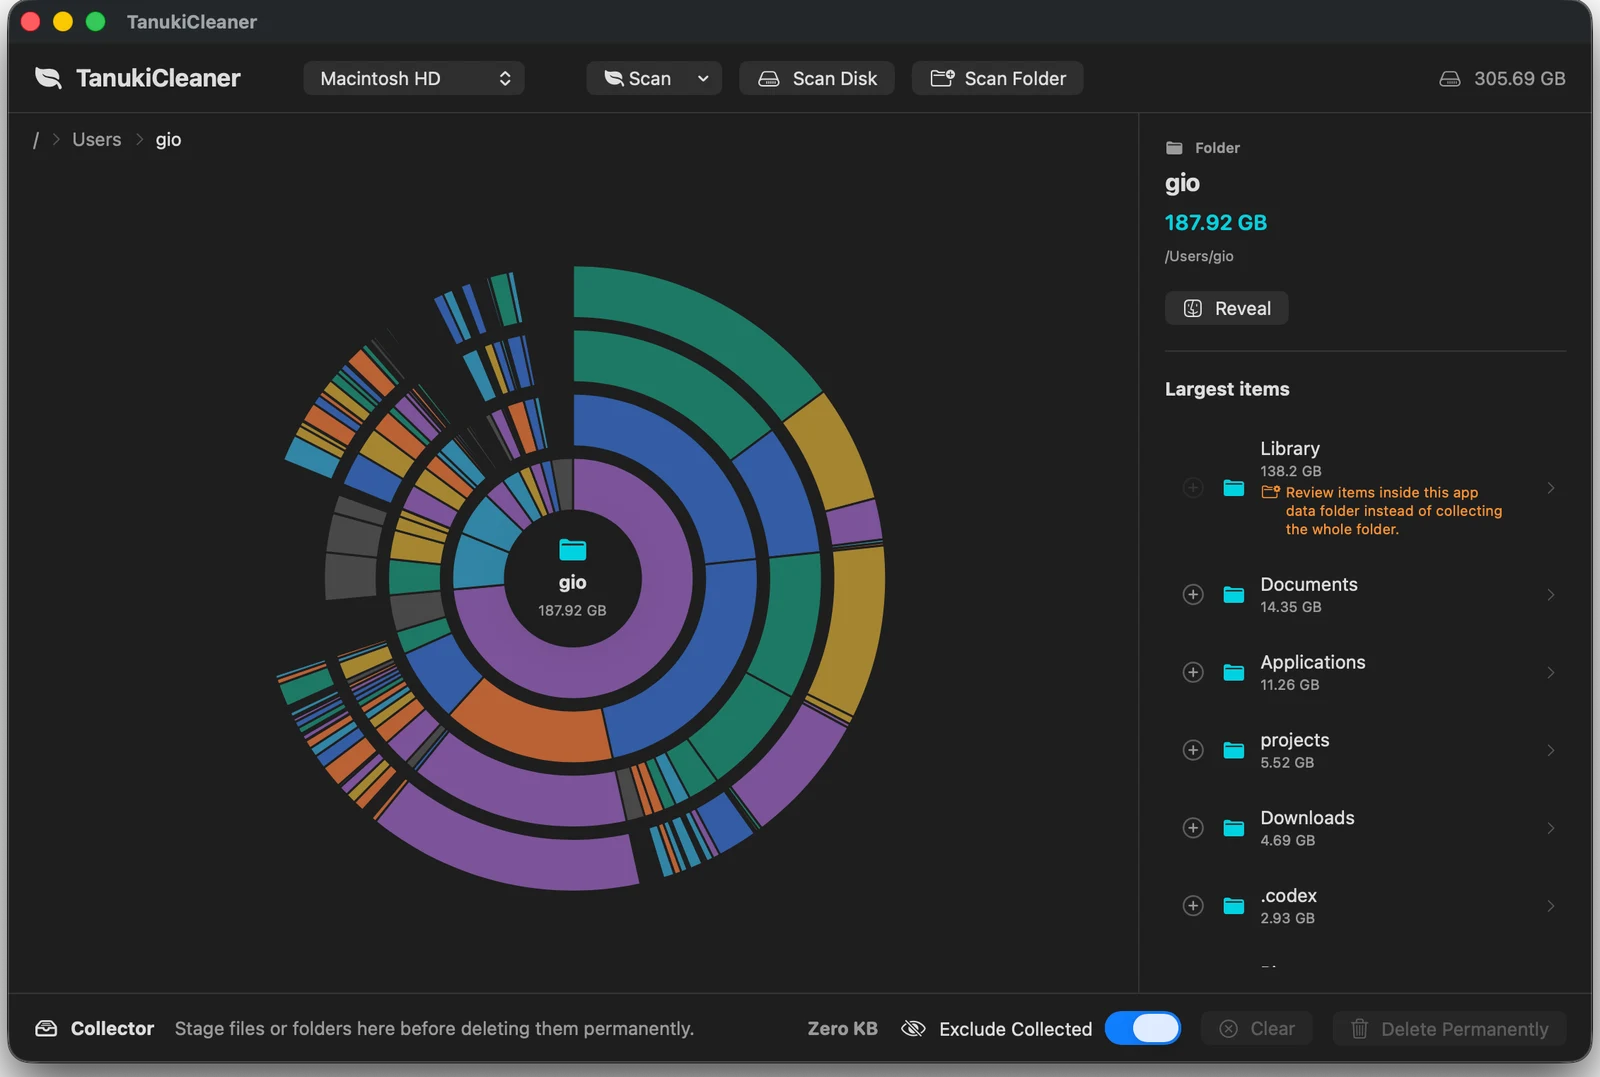
- Select Scan Folder and choose a location you want to investigate. Starting with one folder keeps the scope understandable.
- Check the displayed path or breadcrumbs so you know which location you are viewing. The screenshot shows the home folder; current versions also display the scan scope above the map.
- Follow a large segment or open a folder in Largest items. In this scan Library is largest, but the app cautions against collecting that whole app-data folder. Investigate individual items you recognize instead.
- Select a file to inspect its name, location, and scanned size. Use Reveal to locate it in Finder before deciding what to do.
Check View coverage if the scan seems incomplete. Protected or unreadable locations may be missing. Scanned sizes describe the files the app could measure, not a guarantee of space you can recover.
Want to explore your own folders?
Tanuki Cleaner is free for Intel and Apple silicon Macs running macOS 13 or later.
4. Decide what to keep, move, or remove
Start with files you recognize, such as installers you no longer need or exports you can recreate. Open important documents and check that any backup or external copy is usable before removing the original. For photo libraries, device backups, and app-managed data, use that app’s storage controls rather than deleting unfamiliar pieces of its folders.
You can stop after finding the files and manage them in Finder. In Tanuki Cleaner, adding items to the Collector only stages them for review. Continue to confirmation leads to a separate final decision. Confirmed deletion is permanent and does not move items to the Trash.
If you use Finder’s Trash instead, space is not recovered until the Trash is emptied. Review its contents first. Apple’s cleanup guide also covers moving files to external storage.
Why might the numbers still differ?
Finder search results, macOS storage categories, and a folder scan answer different questions. Tanuki measures allocated file storage in the scanned, accessible locations. It does not delete local snapshots or force macOS to reclaim purgeable space, and deleting a file’s scanned size may not free that exact amount.
A large System Data category is not a single folder to erase. Apple uses it for files outside the more specific categories. Investigate files you understand rather than treating the whole category as disposable.